Home > Europe > United Kingdom > England > London > Royalty
Commander Samson of the Royal Flying Corps... First World War, c1914, (c1920). Creator: Cribb
. Creator: Cribb")
![]()
Wall Art and Photo Gifts from Heritage Images
Commander Samson of the Royal Flying Corps... First World War, c1914, (c1920). Creator: Cribb
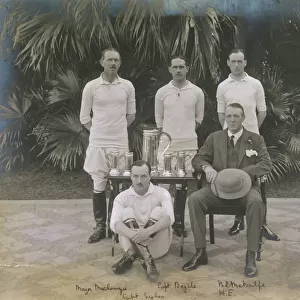
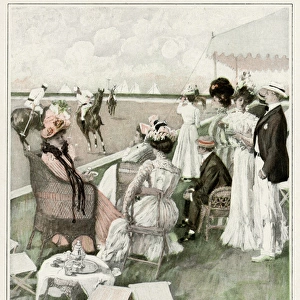
Commander Samson of the Royal Flying Corps with some of his officers, First World War, c1914, (c1920). Heroes of the Royal Naval Flying Corps, right to left: Flight-Lieutenant Draper, Squadron-Commander Briggs D.S.O. (afterwards captured), Flight Commander Osmond, Commander Samson, D.S.O. Flight-Commander Marix D.S.O. (one of the Dusseldorf raiders), Captain Courtney R.M.L.I. (leader of the first Ostend raid), the late Flight-Lieutenant Beevot (killed with Lord Annesley), and Flight-Lieutenant Young. [Flight-Commander Dalrymple Clark behind]. The machine is the one flown by Commander Sansom. From " The Great World War - A History" Volume II, edited by Frank A Mumby. [The Gresham Publishing Company Ltd, London, c1920]
Heritage Images features heritage image collections
Media ID 19175215
© The Print Collector/Heritage Images
Aeroplane Air Transport Aircraft Airmen Airplane Biplane Captain Charles R Commander Frank Arthur Frank Arthur Mumby Gresham Publishing Co Ltd Gresham Publishing Company Keystone Archives Mumby Mumby Frank Arthur Pilot Plane Rnas Royal Flying Corps Royal Naval Air Service Royal Navy Samson The Great World War A History 1st World War Cribb Group Portrait Naval Warfare Squadron Leader
Commander Samson and his Officers - Heroes of the Royal Flying Corps in the First World War
EDITORS COMMENTS
. This print captures a group portrait of Commander Samson of the Royal Flying Corps alongside some of his esteemed officers during the First World War. Taken around 1914 and published in 1920, this historic image showcases the brave men who played crucial roles in aerial warfare. In this remarkable photograph, we see Flight-Lieutenant Draper, Squadron-Commander Briggs D. S. O. , Flight Commander Osmond, Commander Samson himself (decorated with the Distinguished Service Order), Flight-Commander Marix D. S. O. , Captain Courtney R. M. L. I. , late Flight-Lieutenant Beevot (tragically killed with Lord Annesley), and Flight-Lieutenant Young. Behind them stands Flight-Commander Dalrymple Clark. The aircraft featured is none other than the machine flown by Commander Sansom, symbolizing their shared triumphs and challenges in combat. A loyal canine companion adds an endearing touch to this powerful composition. Captured by Cribb and included in "The Great World War - A History" edited by Frank A Mumby, this photograph serves as a testament to these courageous individuals' dedication to duty. Their contributions helped shape aviation history while defending Britain's interests during one of humanity's darkest periods. As we gaze upon this poignant image from over a century ago, let us remember these valiant men who fearlessly took flight amidst chaos and uncertainty – forever etching their names into our collective memory as true heroes of war.
MADE IN THE USA
Safe Shipping with 30 Day Money Back Guarantee
FREE PERSONALISATION*
We are proud to offer a range of customisation features including Personalised Captions, Color Filters and Picture Zoom Tools
SECURE PAYMENTS
We happily accept a wide range of payment options so you can pay for the things you need in the way that is most convenient for you
* Options may vary by product and licensing agreement. Zoomed Pictures can be adjusted in the Cart.